I've been out of touch for a little bit as I took on a pretty big project that's completely unrelated to jewelry. If you read my bio, you might have seen that I have a background in construction (of all things!). I've been in the middle of a major remodel of my parents' house, getting it ready to go on the market. If you can imagine, popcorn ceiling removal, paint, a new multi-level deck, and a total re-do of four bathrooms, including moving walls. If you've ever watched that show Fixer Upper, it's kinda like that...except for unlike the show, it doesn't happen over the course of an hour.
size matters
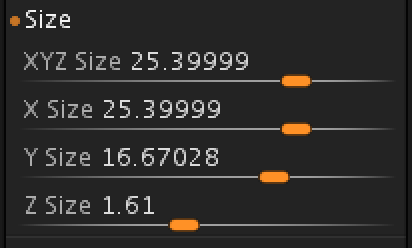
Yup, size can be a big issue when working with ZBrush. While I don't have a formal answer why, I'm guessing that it's because the program was designed to make things that were abstract—things that lived in a virtual world. So for that reason, size is relative in ZBrush, and measured in plain ol' units. Here you can see the Size sub-palette under the Geometry palette on the right-side of the interface.
The pendant on the stage (only the pendant, not the chain), is a minuscule amount smaller than 25.4 units. Well, if you count this as 25.4 millimeters, this equals one inch across. You can also see the Z Size is 1.61 units, so approximately 1.61 mm thick, which is a nice thickness for a pendant. And likewise, the height is 16.7 mm.
When I first started working with ZBrush, I saw a tutorial that suggested calibrating something called the Transpose Line tool. I struggled with this, and every time I thought I had the size correct, something would change and everything would be off. I couldn't reliably gauge bezel cups or stone settings...or even thicknesses. This also became an issue with the amount that a design or text was raised off or inset into the surface. So finding a way to make this work was really important.
Someone also asked me on YouTube if I used a plugin called "ScaleMaster." The answer is no. I have also tried RingMaster, another plugin, which is nice, but I also had some problems with that. However, I DO use RingMaster to insert gemstones because the models contain minimal polygons, meaning they don't slow ZBrush down.
getting started with a correctly sized model
So here's the process I use:
From the right-hand side of the stage, click on the yellow "S" that represents the SimpleBrush tool.
Choose the Cylinder3D from the list.
Click and drag a cylinder on the stage. It doesn't matter how large you make it...it comes into ZBrush at an XYZSize of "2" units.
Immediately press the "T" key to switch to the Edit mode.
Press the Make PolyMesh3D button toward the top under the Tool palette.
Look under the Geometry palette on the right-hand side of the window for the Size sub-palette.
Enter "10" in the XYZSize box and hit return to accept the new size.
The primitive is probably taking up the whole window, so click somewhere on the stage to deselect the number in the XYZSize.
Now press the "F" key to fill the stage with the current object.
And there you have an object on the stage. It's pretty faceted, and not smooth, but we'll deal with that next.
smoothing the primitive
I have a special technique that I've developed to get a smooth object as soon as possible in the workflow. In the beginning, I thought simply performing a DynaMesh operation would smooth it, and I went back and forth between DynaMesh and Polish Features, but with results that weren't efficient or acceptable. So here's how I smooth things out.
Look for a button labeled Divide from the Geometry palette.
Make sure that the Smt button is turned on (this will smooth your primitive).
Click the Divide button twice.
Look above the Divide button for another button labeled Del Lower. This will delete the two lower-resolution subdivisions that you just created.
That should give you a nice, smooth primitive.
So what happened? Each time that you use the Divide command, ZBrush takes each rectangular polygon and divides it into four polygons. Then when you divide again, it divides each one of those resulting polygons into four more polygons. If you have the Smt button activated, it takes the opportunity to smooth out your model.
You can see the underlying geometry of your model by using the Draw PolyFrame (Shift - F) button to the right of the stage, toward the bottom of the vertical row of buttons.
Subdivisions are wonderful if you're roughing out a shape, then switching back and forth between lower resolution subdivisions and higher resolution subdivisions. Adding material with a brush like the ClayBuildup brush works faster when working with a low resolution. But finer details are better applied with the higher resolution. I'll address this in a tutorial later.
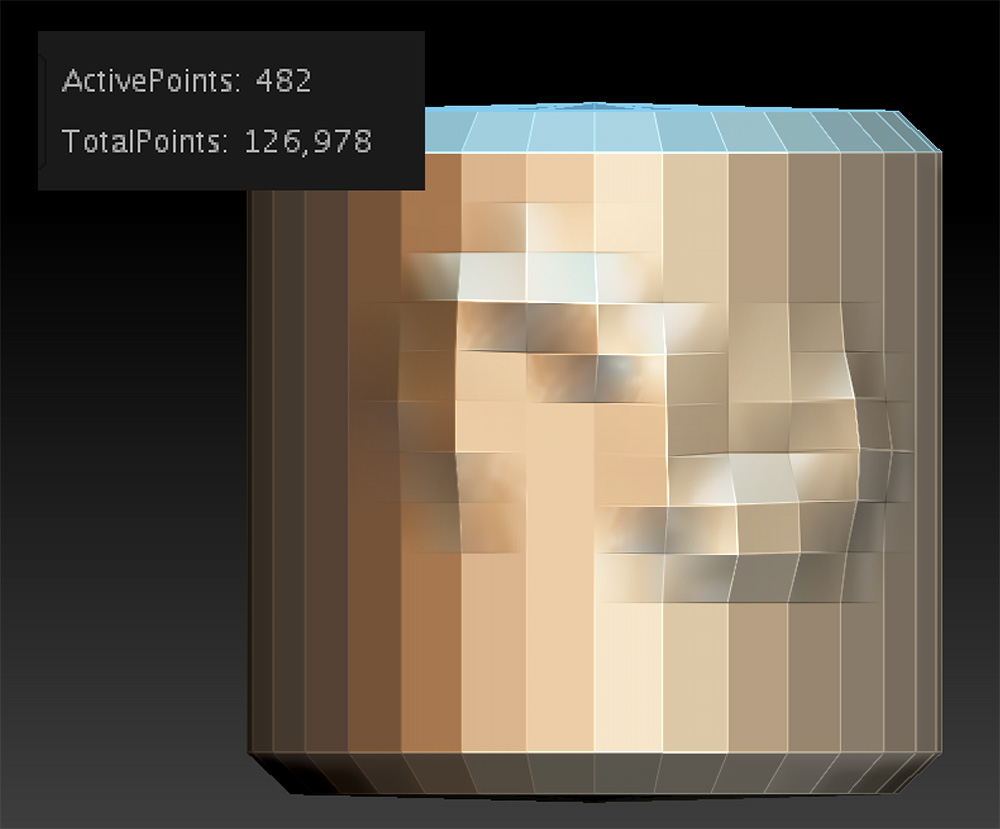
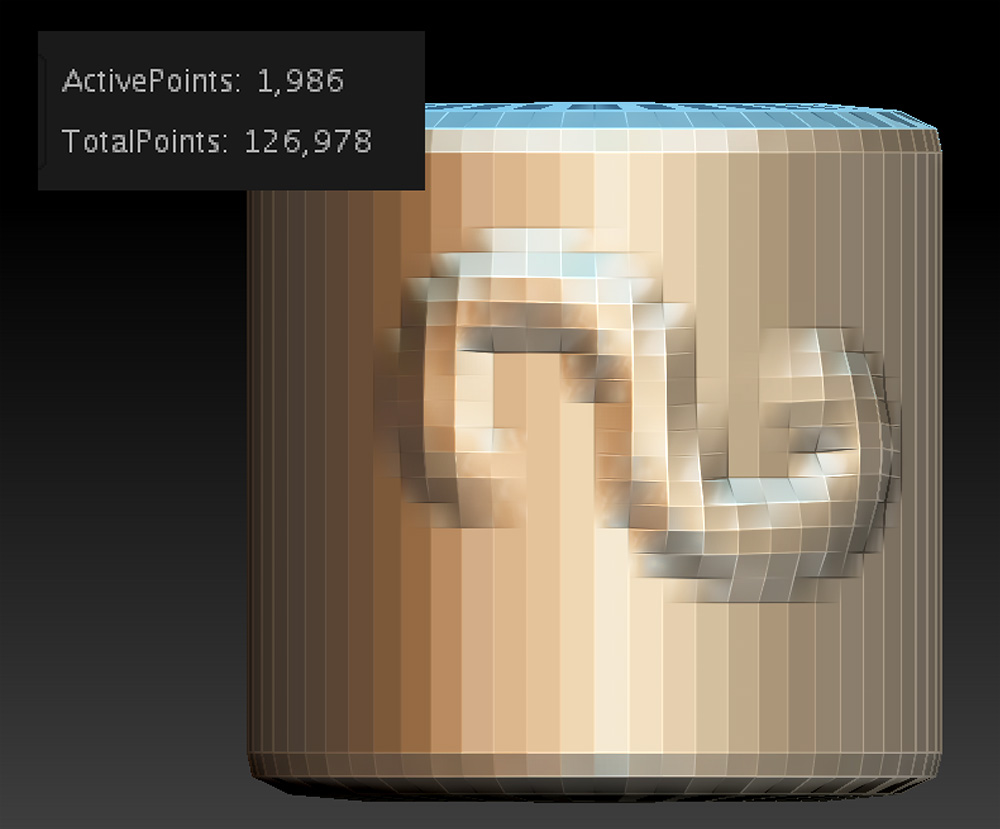
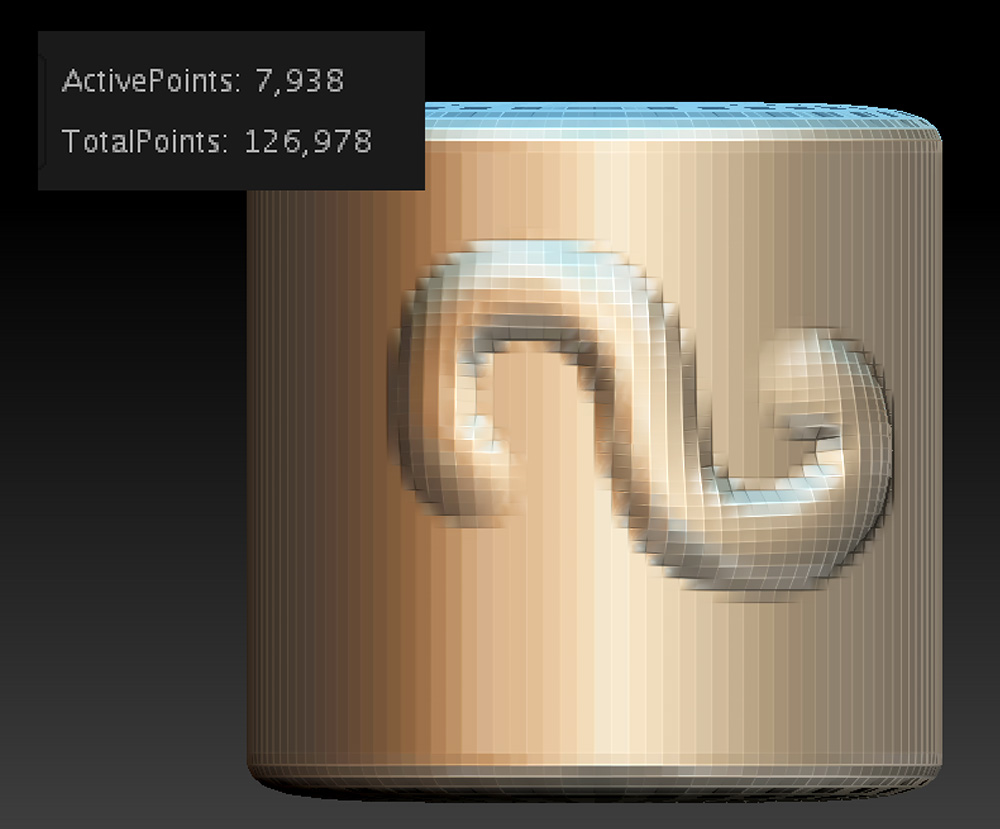
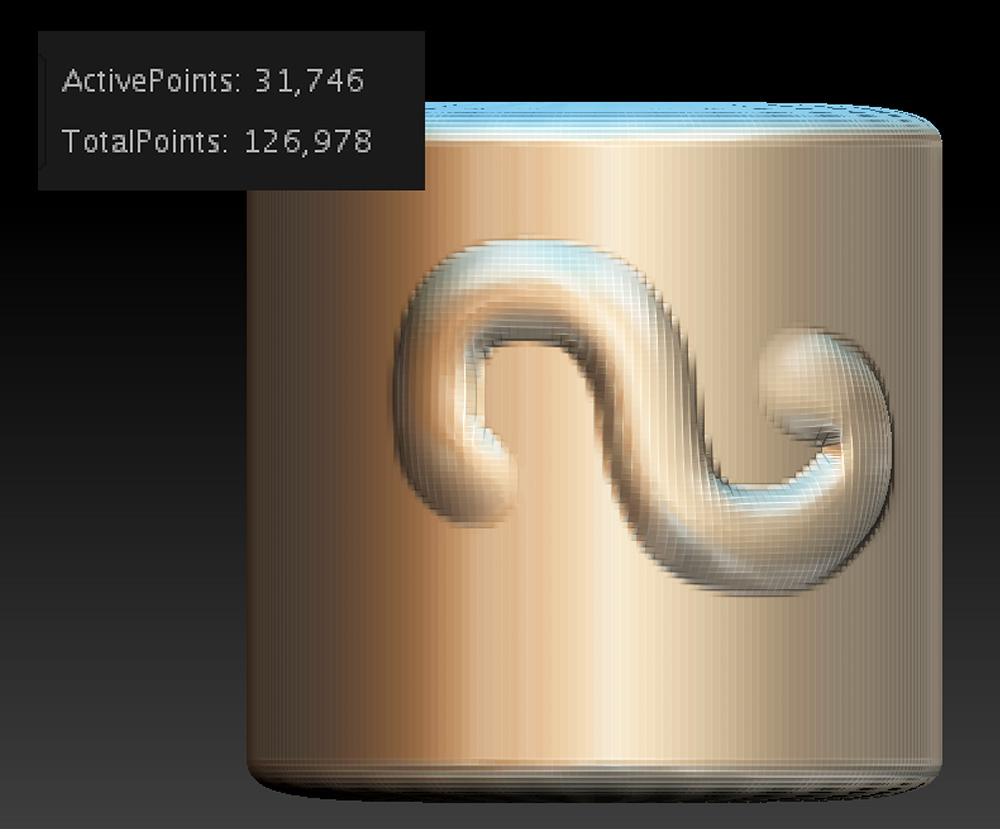
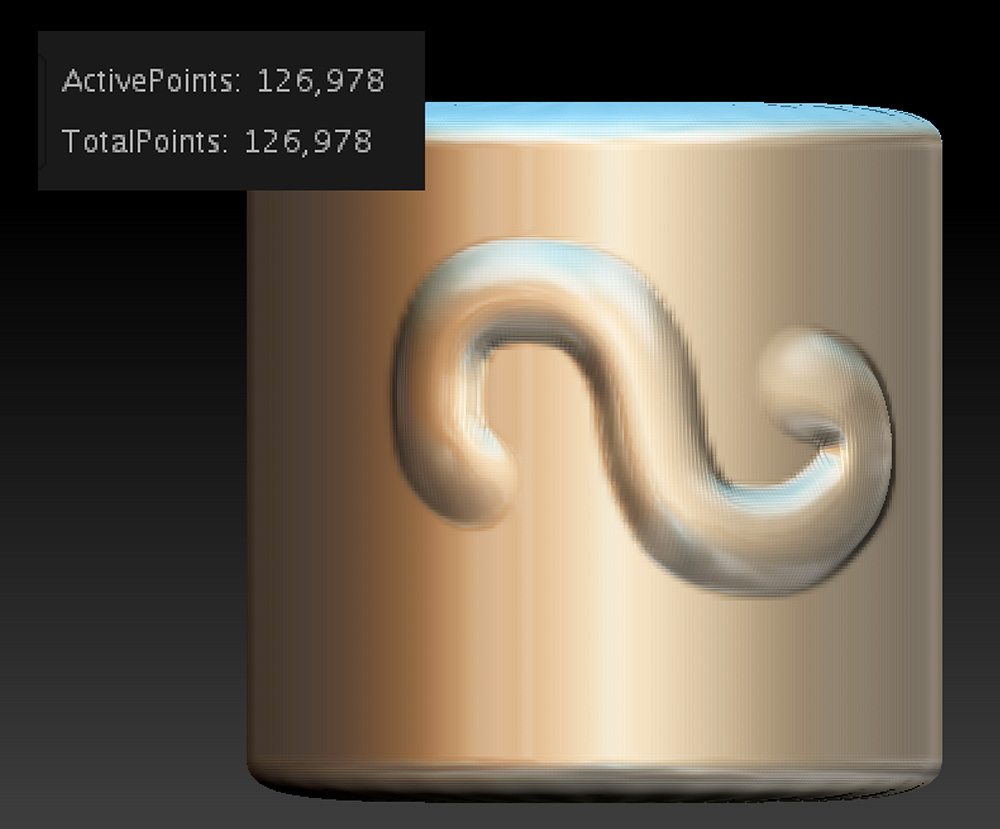
Take a look at the example below...look at the pixillation of the cylinder and the number of ActivePoints. Each time that the cylinder is divided, it QUADRUPLES the number of ActivePoints. This has implications with regard to file size...our strategy is to get a smooth resolution while still keeping the file size down.
So keep this in mind, and I'll write a little more later...then we'll talk about how working in actual size relates to your DynaMesh resolution. and how you can work more efficiently and on lower-end hardware.
Heck, I can even run ZBrush on my 2012 MacBook Pro! And you know what that means? I can sit in a café in the Caribbean and design jewelry. SWEET!
